Believe it or not, not everyone knows how to carve a pumpkin. And remember, this is the World Wide Web, so some visitors may have never even heard of the idea before. So we'll start with the basics, and then offer some advanced tips.
Basic Pumpkin Carving
 1. Cut the lid or the bottom: Cut
at least a 4 inch diameter hole in a small pumpkin; a 6-8 inch hole is needed
in a larger pumpkin. Cut the lid at an angle so that the lid will rest on
a ledge, and not fall inside the pumpkin. It is also helpful to cut a notch
or "key" in the lid, rather than making it a perfect circle. This
will help you line up the lid just right when replacing it after lighting
the candle. If you cut out the bottom instead of the top, you'll be able
to light the candle and then lower the pumpkin into place. But you must
be careful to make the bottom cut out in such a way so that the pumpkin
will sit solidly and not tip off of the base.
1. Cut the lid or the bottom: Cut
at least a 4 inch diameter hole in a small pumpkin; a 6-8 inch hole is needed
in a larger pumpkin. Cut the lid at an angle so that the lid will rest on
a ledge, and not fall inside the pumpkin. It is also helpful to cut a notch
or "key" in the lid, rather than making it a perfect circle. This
will help you line up the lid just right when replacing it after lighting
the candle. If you cut out the bottom instead of the top, you'll be able
to light the candle and then lower the pumpkin into place. But you must
be careful to make the bottom cut out in such a way so that the pumpkin
will sit solidly and not tip off of the base.
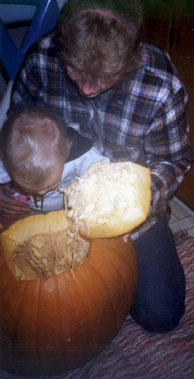
2. Scoop out the goop: Using a large spoon, scoop out the strings and seeds. Then scrape the inside walls of the pumpkin down to a solid surface with no strings remaining. In response to the young woman from Austria who bought a pumpkin: No, you don't eat the stringy goop. Throw it away. However, many people like to roast and eat the seeds. Our Cooking page has roasting instructions.
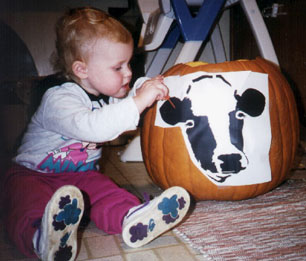 3. Mark a design: Use a poker or a
marking pen to mark a design. Faces are customary, but words or any sort
of design is OK -- it's all up to the individual carver. You can first draw
a design on a piece of paper and then transfer it to the pumpkin. Tape the
paper to the pumpkin and use a pushpin to trace the design by poking a series
of holes into the pumpkin where you will cut. Make some cuts from the edge
of the paper toward the center, to help the flat piece of paper fit better
against the round pumpkin.
3. Mark a design: Use a poker or a
marking pen to mark a design. Faces are customary, but words or any sort
of design is OK -- it's all up to the individual carver. You can first draw
a design on a piece of paper and then transfer it to the pumpkin. Tape the
paper to the pumpkin and use a pushpin to trace the design by poking a series
of holes into the pumpkin where you will cut. Make some cuts from the edge
of the paper toward the center, to help the flat piece of paper fit better
against the round pumpkin.
 4. CAREFULLY carve your design:
You can use a knife or a special pumpkin carving saw tool. A saw tool or
a serrated knife used with a sawing motion are preferred over an ordinary
knife. It is easier to control the direction of the knife while sawing.
An ordinary knife has a tendency to all of a sudden slice too far when you
push on it -- which can ruin your design and hurt you or someone next to
you.
4. CAREFULLY carve your design:
You can use a knife or a special pumpkin carving saw tool. A saw tool or
a serrated knife used with a sawing motion are preferred over an ordinary
knife. It is easier to control the direction of the knife while sawing.
An ordinary knife has a tendency to all of a sudden slice too far when you
push on it -- which can ruin your design and hurt you or someone next to
you.
THIS IS A JOB FOR AN ADULT. CHILDREN SHOULD NOT BE ALLOWED TO DO THEIR OWN CUTTING!
5. Light your creation: Place a flashlight or a candle inside the pumpkin. If using a candle, use a short, wide candle that won't tip, or use a special candle holder available in stores. Lighting the candle once it is inside the pumpkin can be tricky. As mentioned, with a bottom cut-out, you can light the candle and place the pumpkin down on top. With a traditional top lid, tip the pumpkin slightly and light the candle; use extra-long fireplace matches, inserted from the side through your design; or make a match holder by taping a clothespin to a pencil or similar lengthy stick, and insert the lit match into the pumpkin through the cut-out design.
Edward Palmer, in his book "Pumpkin Carving," recommends cutting a chimney in your pumpkin. Let the candle burn for a few moments, then check for the sooty spot on the top of the pumpkin. That shows where the hot air is rising above the flame. Cut a 1 inch diameter hole at the spot to allow better air flow through the pumpkin.
Advanced Tips
--Commercially made pumpkin carving kits are available in stores. These include special saws and other tools, as well as patterns for designs you can carve. One thing the instructions may not tell you: you can use a copy machine to enlarge or reduce the designs to fit the pumpkin you wish to carve.
--Add color with colored wax paper. Cut pieces to fit the cutouts on your pumpkin and use straight pins to tack them to the inside.
--Use toothpicks (the sturdy round ones) to make objects "float" in your design. For example, to make an eyeball float in the middle of a larger eye cutout.
--You don't always have to cut all the way through the pumpkin. Interesting effects are achieved by carving away just the outside rind of the pumpkin, and by carving to different depths through the flesh. Your design will "glow."
--Experiment with different tools. You can try wood-working tools from the hardware store or art-supply store, or melon ballers or other kitchen gadgets.
--Don't carve your pumpkin more than a day before you will display it. Carved pumpkins don't keep, but refrigeration and vegetable oil or petroleum jelly rubbed on the cut areas can delay aging.
--While you shouldn't carve your pumpkin too early, you can get creative right away by making a face with a marker or paint. Then cut out the face just in time for Halloween.
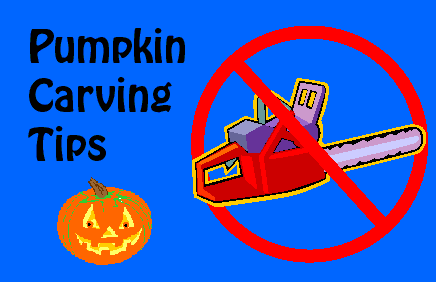
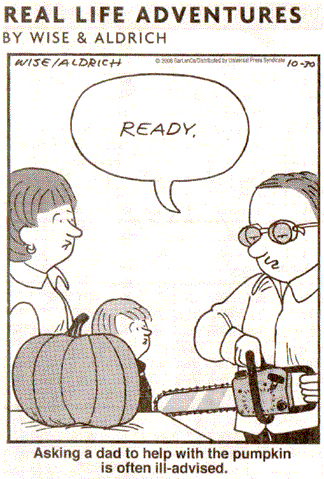
--No matter how large your pumpkin, never carve with a chain saw! Not only is it dangerous, but it's very, very, very, very messy!
--A good source for pumpkin carving information and some AWESOME patterns is the book "Pumpkin Carving" by Edward Palmer (Sterling Publishing Company, Inc., New York).
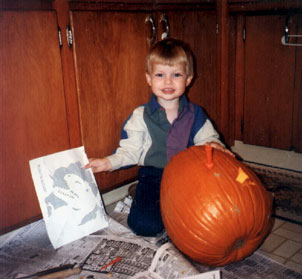
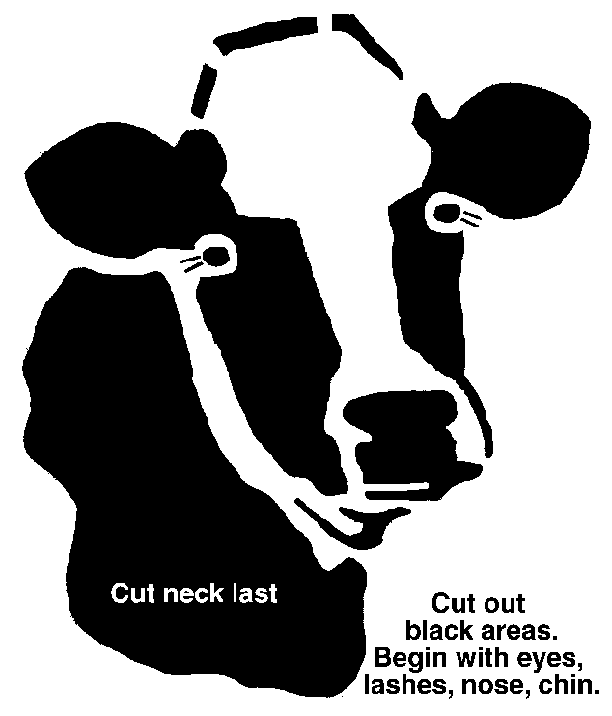
The Downing Cow Pumpkin
Here's one you won't find in the stores! Copy the cow pattern graphic below and print it out at the size you need, or do a print screen and then use a photocopier to make the cow the size that fits your pumpkin.
Some other sites with lots of carving information:
www.costumesupercenter.com/carvejackolantern.html
send your carving tips via e-mail to:
mail ["at"] downingpumpkins [.com]
[HOME | FARM TOUR | PUMPKIN SALES INFO | PUMPKIN FACTS | COOKING]
[ASK DAISY | CARVING TIPS | [PUMPKINS IN THE CLASSROOM | HUMOR]
[JACK-O'-LANTERN HALL OF FAME | PUMPKIN BOWLING]
[THE COWS | THE BARN | BEES | ANIMAL TALES | FAVORITE LINKS]
[LIFE CYCLE: A YEAR IN THE FIELD]